Parallel compression, also known as New York style compression, is a mixing technique that involves adding a strong dose of compression to an audio track while still allowing the original dynamics to shine through. The result is a thick, punchy sound.
Although parallel compression can be used on any type of audio, it is particularly suitable for drums and other percussion instruments. When used correctly, parallel compression can give your tracks a professional sheen that will make them stand out from the rest.
However, it’s important to avoid going overboard, as too much compression can result in a muddled sound. If you want to add a bit of punch to your tracks, it’s worth checking out parallel compression.
How to do parallel compression?
Unlike traditional compression methods, which involve compressing the signal of an entire mix at once, parallel compression involves compressing different parts of the mix separately and then combining them. While this may seem like a more complicated method, it can actually be quite straightforward to set up.
First, create two duplicate tracks of your audio. Then, apply compression to one of the tracks and leave the other uncompressed. Next, adjust the levels of both tracks so that the compressed track is quieter than the uncompressed one. Finally, blend the two tracks to taste. By following these steps, you can achieve a volume boost without sacrificing clarity or dynamic range.
The best plugins for parallel compression (and how to use them)
If you want to add a bit of punch, depth, and power to your tracks, parallel compression is the way to go. But, which are the best plugins for this task? In this blog post, we will break down the three best plugins for parallel compression and show you how to use each of them.
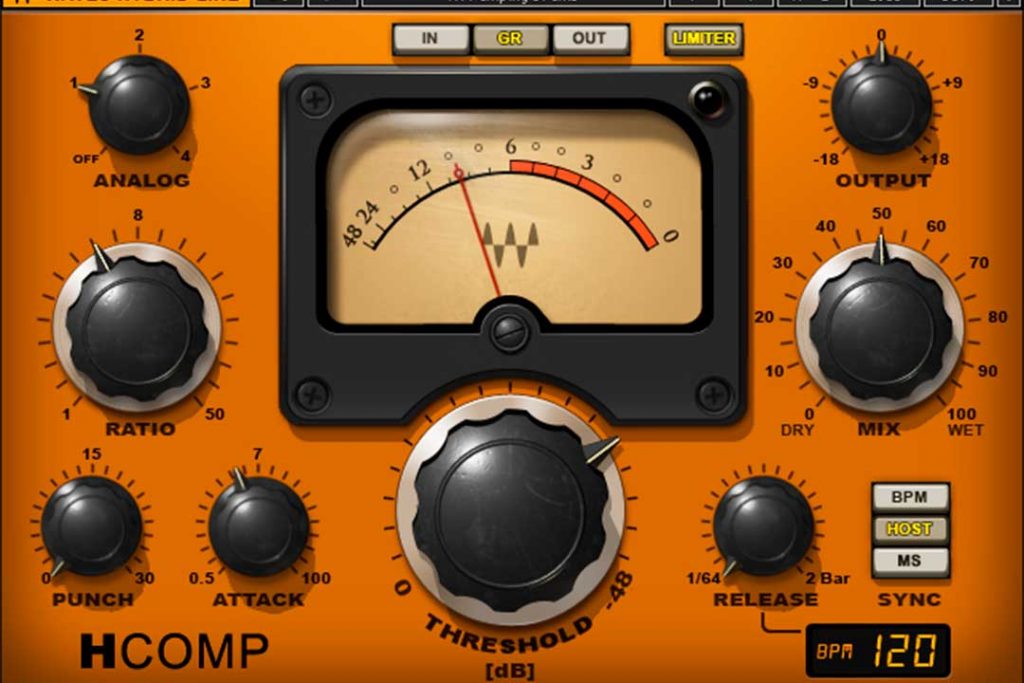
Waves H-Comp Compressor
H-Comp is a hybrid compressor that combines the best aspects of digital and analog compression. It’s perfect for those who want absolute control over their sound.
To use H-Comp for parallel compression, simply insert it on a new track and set it to “Sidechain”. Then, send the signal you want to compress to H-Comp. Finally, adjust the threshold, ratio, attack, release, and makeup gain to taste.
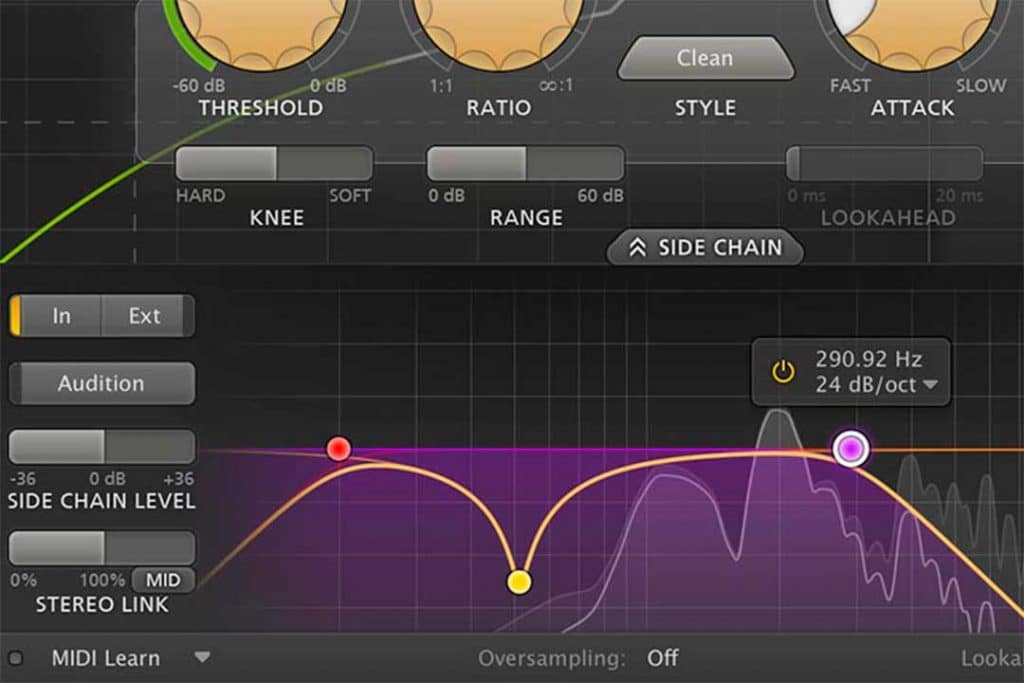
FabFilter Pro-C 2
Pro-C 2 is an excellent soft knee compressor that can achieve both gentle and hard compression. To use Pro-C 2 for parallel compression, insert it on a new track and configure it as follows:
- Threshold: -20 dB
- Ratio: 4:1
- Attack time: 0.3 ms
- Release time: Auto
- Makeup gain: 0 dB
- Output level meter scale: Short needles
- Stereo link: On
- Channel mode: L/R (stereo) or Mid/Side (MS)
Once you have set the settings, activate the “Peak” button and adjust the attack time until you hear the pumping. Reduce the attack time until you no longer hear the pumping and you’re done!
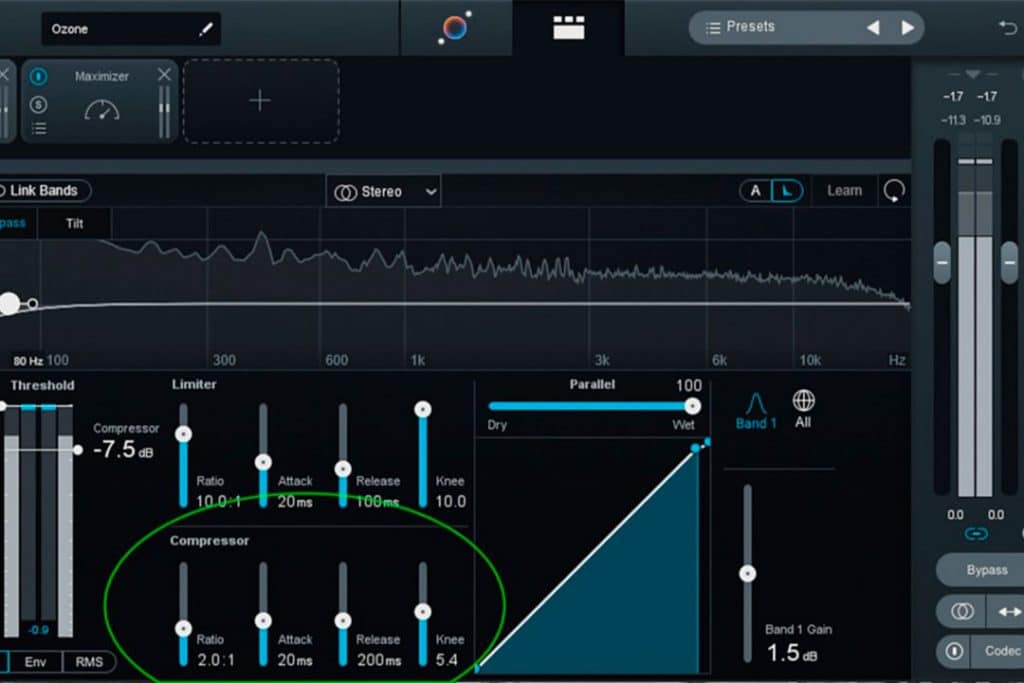
iZotope Ozone 10 Dynamic EQ
Ozone 10’s Dynamic EQ is based on Neutron 2’s Spectral Shaper, so you know it’s good. To use Ozone 10’s Dynamic EQ for parallel compression, add it to a new track and configure it as follows:
- Mode: Saturate & Shape
- Drive amount: Depends on the amount of saturation you want; start at a low level and increase as necessary
- Cutoff frequency (kHz): 20
- Q Factor (/100): 1
- Dry/Wet mix (dB): -6
- Input level (dBFS): -20
- Output level (dBFS): 0
- Ceiling type: Hard knee
- Makeup button: On
- Mode switch: Dynamic EQ
- Parametric EQ Band 1: Lower all sliders except Frequency; set Frequency to 60 Hz; raise Q until you hear a slight boost; lower Q until you stop hearing the boost
- Parametric EQ Band 2: Lower all sliders except Frequency; set Frequency to 500 Hz; raise Q until you hear a slight boost; lower Q until you stop hearing the boost
- Low Shelf Filter: Lower all sliders except Frequency; set Frequency to 80 Hz; raise Q until you hear a slight boost; lower Q until you stop hearing the boost Tame Resonance Peak: Now that you have your plugin inserted and your settings marked, simply activate the “Saturate & Shape” button of Ozone 8 and adjust the Drive amount until you get the sound you are looking for. That’s it.
Now that you know the best plugins for parallel compression and how to use them, put them to good use and see what they can do for your tracks! As always, happy mixing!
Step-by-step Guide to Parallel Compression for Drums
Mixing drums can be a tough task, especially when it comes to achieving the perfect sound.
A common technique that many engineers use to achieve this is called parallel compression, or New York compression. This method gets its name from the fact that it was popularized in the 1970s by engineers working in New York City. Let’s see how it’s done.
Parallel compression is a mixing technique that involves mixing a dry track with a compressed one to get the best of both worlds. The goal is to add punch and density to the drums without losing their natural dynamics. For this, you will need two things: an audio interface and a compressor.
First, you will need to send the drum track through the compressor. Then, you will need to adjust the threshold so that only the loudest hits are compressed. Next, you will need to adjust the attack and release time so that the compressor does its job without changing the drum sound too much. Finally, you will need to mix the compressed track with the dry track until you find the perfect balance.
Parallel compression is a great way to add punch and density to your drums without losing their natural dynamics. By following these steps, you should be able to achieve the perfect sound for your project. As always, make sure to experiment and find what works best for you and your project.